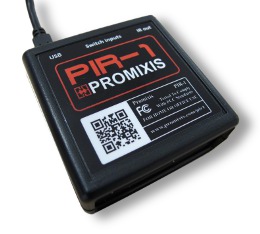
Using your PIR-1
The PIR-1 can be used to receive and transmit IR signals in several ways. First we'll describe how to get the PIR-1 going in Girder 5, then how to learn an IR code and finally how to transmit IR signals.
Setting up the PIR-1
The PIR-1 uses HID communications with your computer, for you that means that there are no drivers to install in Windows, the unit is automatically recognized.
Inside Girder you have to make sure you have at latest version. Before you do anything open the log window in Girder (F4 or View->Logger).
Open the Settings dialog and go to the Plugins section. In the long list of supported hardware look for the "Promixis PIR-1 driver" and enable it by clicking the checkbox in front of it.
The logger should now display some information and among that information you should see a line much like this:

Learning and Sending
Each PIR has a unique serial number, this is used to determine what PIR will be used for transmitting IR codes, allowing you to have multiple units connected.
If you do not see this entry make sure the PIR-1 is connected to your computer and that it's green light it on.
Now to the real stuff, in the Girder tree, create a new GML and click on it's yellow folder. Then from the left hand side action toolbox find the PIR actions and double click on "Send CCF". This will create a new action that sends IR codes.

In that box click learn. Now hold the remote you wish to learn from in front of the red window on the PIR-1. Hold it real close and press and hold the button you wish to teach. First the PIR-1 will learn the codes then it will determine the modulation frequency used by the remote. Keep holding until the CCF code appears.

0000 006E 0000 0022 0156 00A9 0014 0014 0014 0040 0014 0040 0014 0040 0014 0014 0014 0040 0014 0040 0014 0014 0014 0040 0014 0014 0014 0014 0014 0014 0014 0040 0014 0014 0014 0014 0014 0040 0014 0040 0014 0014 0014 0040 0014 0040 0014 0040 0014 0014 0014 0014 0014 0014 0014 0014 0014 0040 0014 0014 0014 0014 0014 0014 0014 0040 0014 0040 0014 0040 0014 05EF
You typically don't need to worry about it's contents. But using the IR workshop you can look at it more detailed.Try sending the signal to the device to make sure the learning was done correctly.
Learning in the IR Profile Editor
Learning can also be done from the IR profile editor.
3rd Party hardware
The PIR-1 can be connected to a Xantech Powered/Amplified Connecting Block. To connect a PIR-1 simply connect the ground ring to GND and either of the signal rings to the IR in port. Do not plug the PIR-1 output directly into the IR RCVR port.
